


Introduction to Appwrite
Appwrite is an open-source, Backend-as-a-Service(BaaS) Platform. It provides developers with a set of pre-built APIs and tools to simplify the development of web and mobile applications. With Appwrite, developers can focus on building the frontend of their applications while delegating the backend infrastructure tasks to the platform. This saves time and effort by abstracting away the complexities of setting up and managing server infrastructure, databases, and other backend components. It offers a variety of features and functionality commonly needed in modern applications, such as user authentication, databases, file storage, serverless functions, and more.
In this blog, we will understand how to create an appwrite project, integrate it with your React Web Application and make use of signup and login functionality to create users for your application.
Creating Appwrite Project.
Before we dive into the different features provided by appwrite, it is important to create an appwrite project inside your profile. Go to Appwrite Login and create your profile if you don't already have one. Once your profile is created you will be redirected to the Appwrite console.
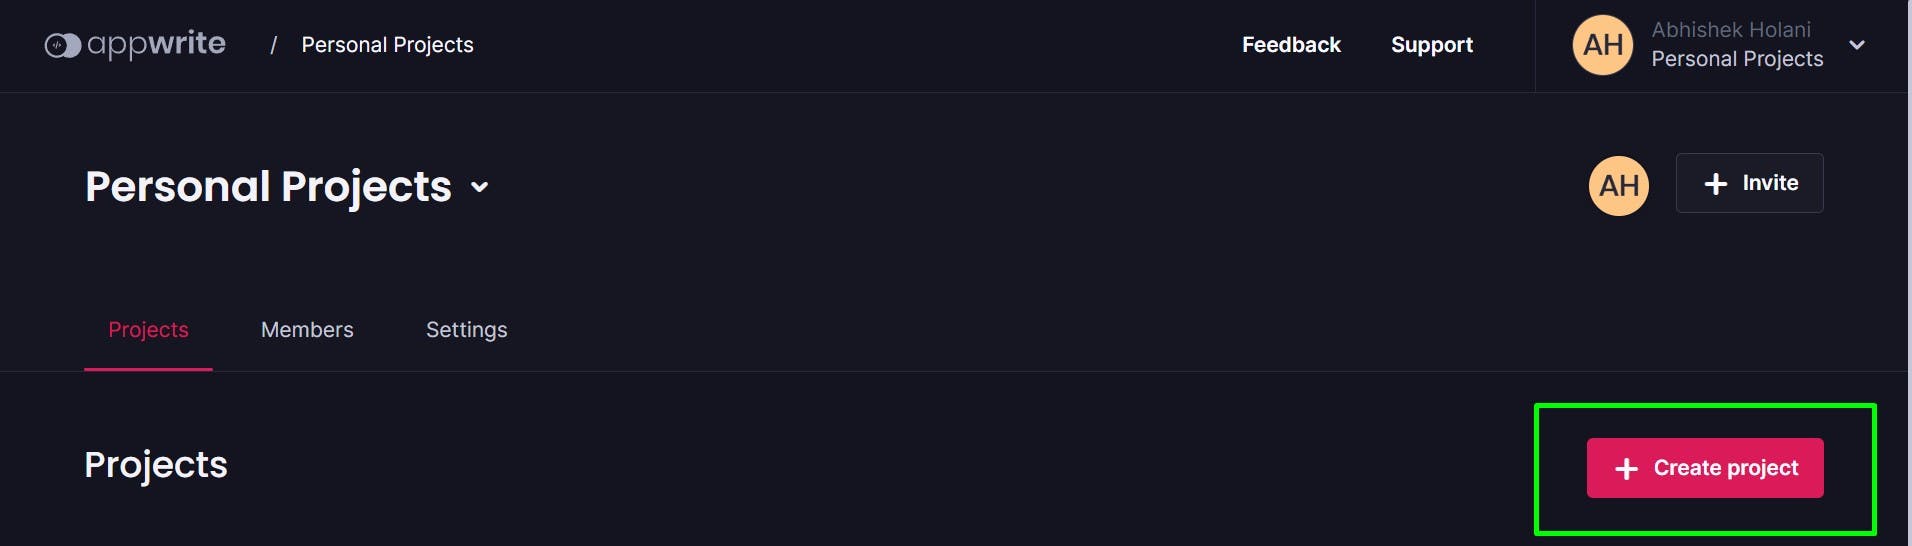
Once you are on your appwrite console, click on the Create Project button to create your project, you will be asked to give your project a name, for the sake of this blog, you can name it as Expense Manager. You can also provide a custom Project ID if you want, otherwise, appwrite will create one for you. Click on Create button to create your first Appwrite Project.
Before we move forward, give yourself a pat on the back for you have created your first appwrite project.
On the console, you can see your project. Click on the project and you will be directed to your project dashboard. On the left side of the dashboard, you will find various options to modify your project.
Adding a Platform to Appwrite Project.
Now let us add a platform to your appwrite project. A platform is nothing but an application that will use your appwrite project as backend. You can add serveral types of platforms to your appwrite project, Web, Flutter, Android etc.
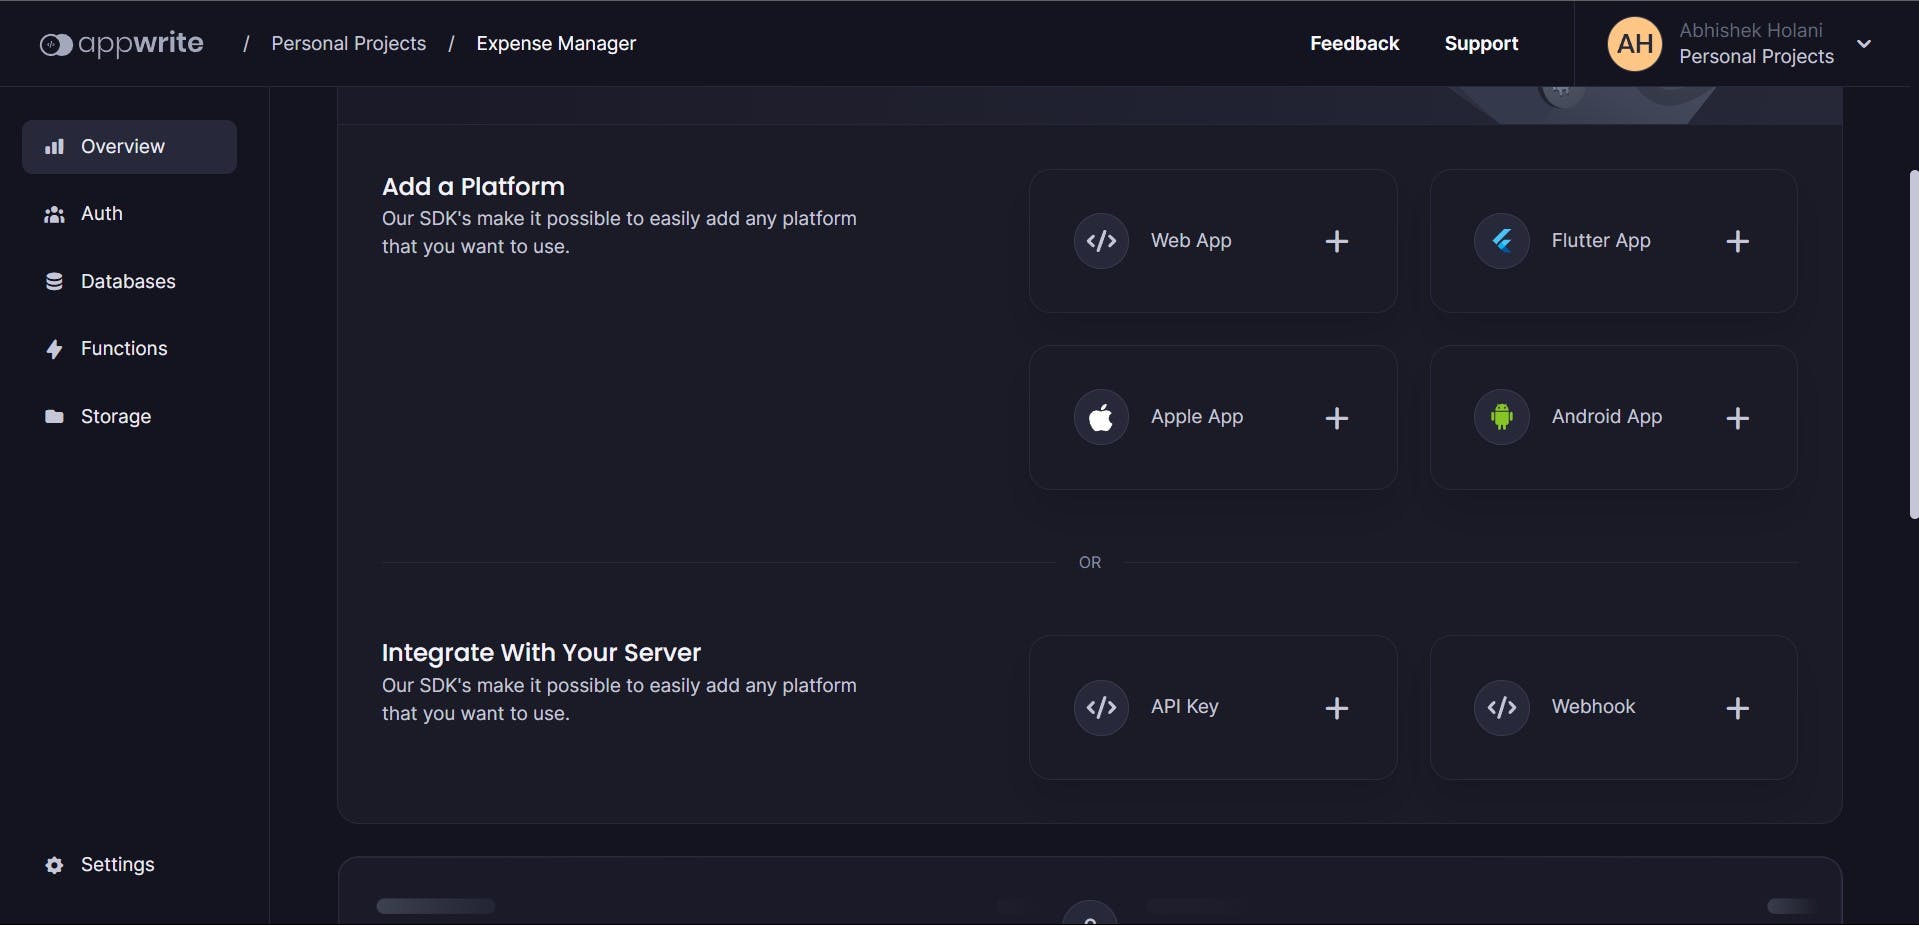
For this blog, we will be adding a web application platform to your Appwrite project. Click on the Web App option and you will be asked to give a Name and hostname to your application.
Note: Giving hostname to your project enables Cross-Domain requests. Be careful which domains you allow access to your project. For the purpose of this tutorial, put your hostname as
localhost*
After giving Name and hostname, there are a few optional steps, skip them for now. We will come back to it in the next Section.
Now you have created your appwrite project and added a platform to integrate your appwrite project into. Let's us move forward and understand how to integrate our frontend with this app write backend and use Appwrite's various features to build a full stack web application.
For the purpose of this tutorial, I have created a React frontend application for Expense Manager application. You can download the source code from here.
All the required packages including APPWRITE is already part of the project dependencies.
Note: As we move forward with the integration, ensure all the files are created in the exact same directory to avoid import and other issues in your frontend application. Toward the end, I will attach a screenshot of my folder structure to ensure you have the same setup.
//Enter the root folder of the download source code
//and run the following commands in sequence in your terminal

//Install all dependecies
yarn or npm install

//Run the appplication.
yarn start or npm run start
Integrating Appwrite with React Application.
Integrating Appwrite with applications means communicating and connecting your application to our appwrite project so that we can consume all the services and APIs provided by appwrite in the frontend. Once you connect your frontend to appwrite backend, we can start to use all the services in order to have a functioning backend.
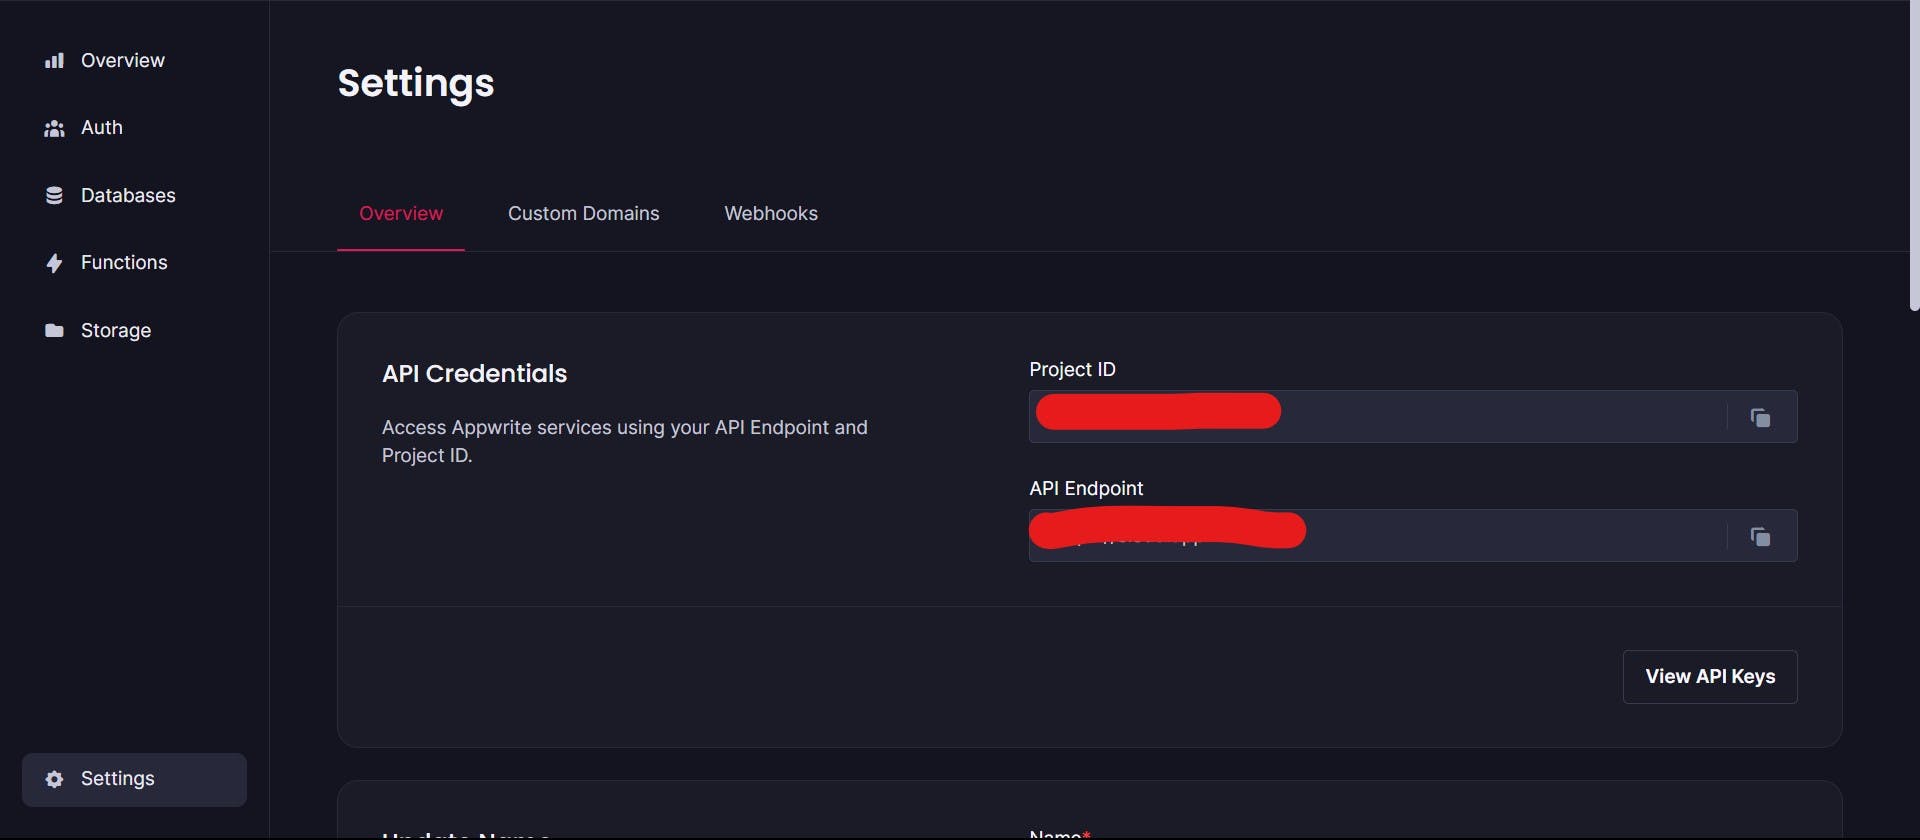
To integrate our Appwrite project with our React Application first we need to create an appwrite instance in our frontend. We need our appwrite projectID and project endpoint to create our appwrite instance. To get these values go to our Expense Manager Appwrite project console and click on settings at the bottom on the side menu. There you can find these required credentials.
In the src folder of our React Application, create a folder named appwrite, inside it create a file appwrite.js and paste below code inside.
import { Client as Appwrite } from "appwrite";

// Paste above credentials in below variables
const AppwriteProjectEndpoint = "DUMMY ENDPOINT";
const AppwriteProjectID = "DUMMY PROJECTID";

// Here we are creating an instance of Appwrite for our Appwrite project
// Using this instance we will communicate with our backend Appwrite.
const appwrite = new Appwrite()
  .setEndpoint(AppwriteProjectEndpoint)
  .setProject(AppwriteProjectID);

// Exporting for use.
export default appwrite;
In the above code we are creating a global appwrite instance which we can use anywhere to use the appwrite services. We are setting our project id to this instance so that appwrite knows which project we want to connect to. Now that we have successfully integrated appwrite into our web applications and created an instance for us, let us understand how we can consume the Appwrite services.
User Authentications.
Signup:
Appwrite provides a pre-built API for user authentication. This makes it easy for us to implement user signup and login. Go to Signup.jsx file inside our React Applications. First we need to import out appwrite instance. Then we import Account and ID classes from local appwrite SDK.
import appwrite from "../appwrite";
import { Account, ID } from "appwrite";
Now we need to create a function that will be called once we submit our signup details form.
// Signup.jsx

const navigate = useNavigate();
  const account = new Account(appwrite);

  async function handleSignupSubmit(event) {
    event.preventDefault();
    event.stopPropagation();

    try {
      const response = await account.create(
        ID.unique(),
        signupCredentials.email,
        signupCredentials.password,
        signupCredentials.name
      );
      localStorage.setItem("user", JSON.stringify(response));
      navigate("/dashboard");
    } catch (error) {
      window.alert(error);
    }
  }
Copy above code and add it inside our Signup.jsx file inside the Signup Component function. Also add an onSubmit handler for our form like below.
<Form onSubmit={handleSignupSubmit} className="mt-4">
Let us understand what the above code does.
First we are creating a new instance of the Account class. We are giving our appwrite instance to this account instance so that the account class knows which project we are trying to authenticate the users. Then we create an asynchronous function handleSignupSubmit to complete the signup process. In this function we are using create function of Account class to create a new user in our application. This function takes a unique user id created by ID.unique() , user email id, password and name(optional).
Appwrite performs inline error handling, incase there is in error while creating user, appwrite will terminate this function and log an error on browser console. If the user creation in successful, we will go to next line. Here response from appwrite will be stored in local storage for further user and we navigate to dashboard page.
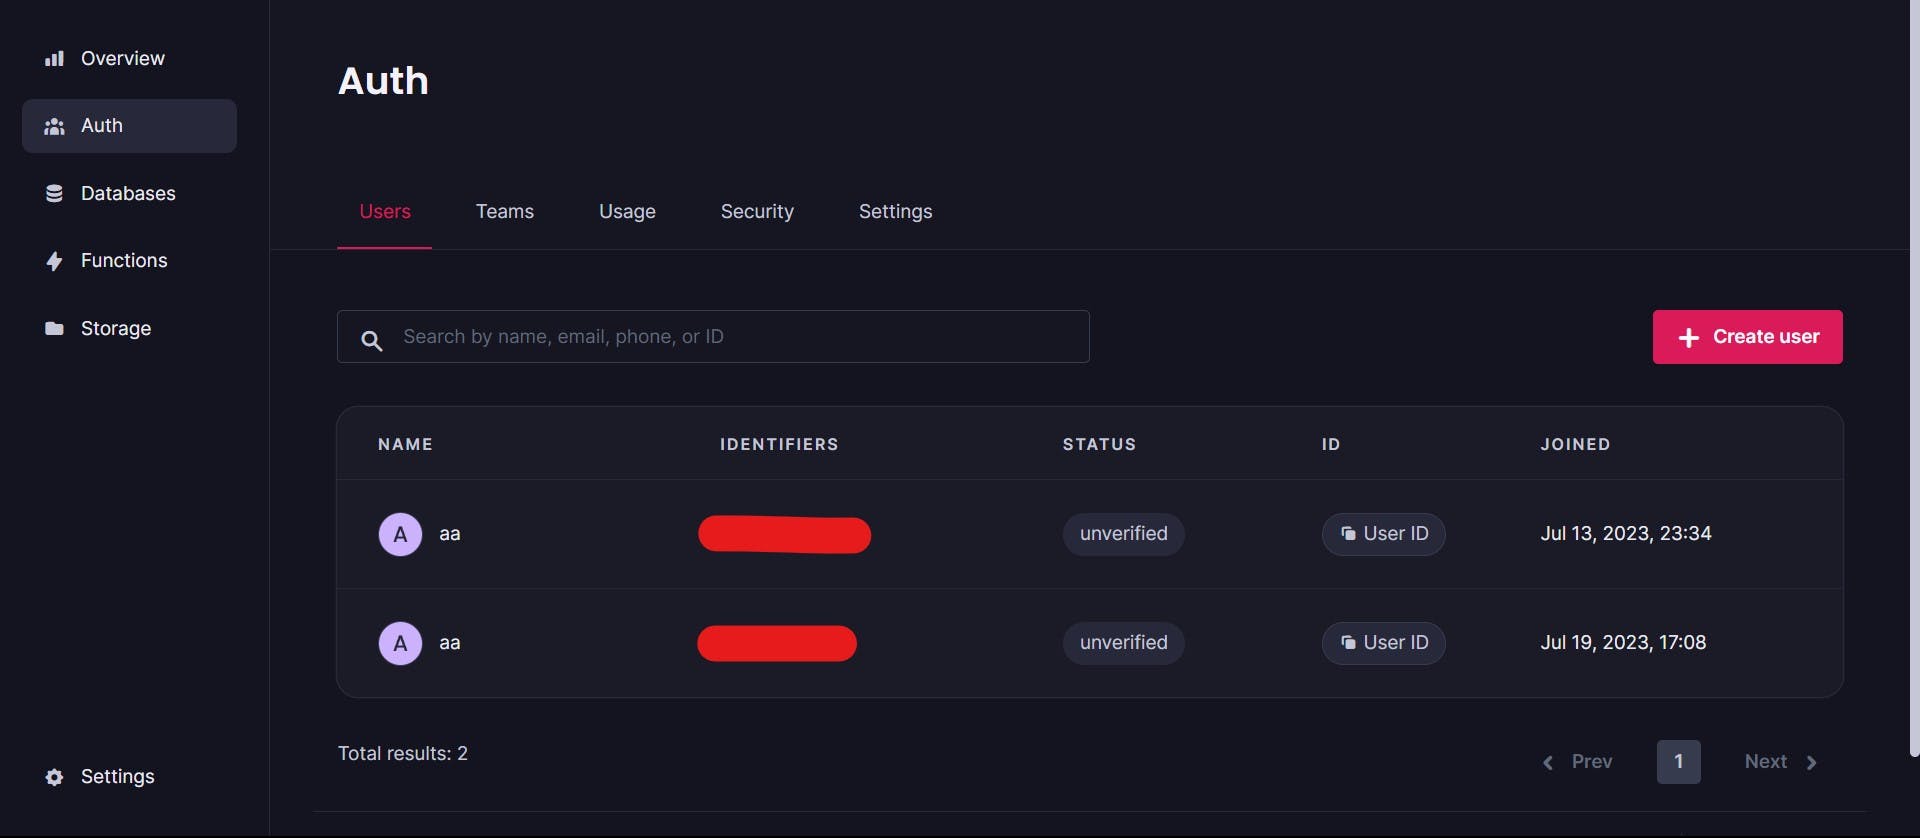
To check if your user is created or not, go to your appwrite project -> Auth (Side menu), you will see all the users created.
Login:
Now let us understand how to implement login functionality using appwrite. Go to the Login.jsx file in our React Application. Like signup, we will import appwrite instance and Account class.
import appwrite from "../appwrite";
import { Account } from "appwrite";
Now we will create a function to handle user login.
// Login.jsx

const navigate = useNavigate();
  const account = new Account(appwrite);

  async function handleLogin(event) {
    event.preventDefault();
    event.stopPropagation();

    try {
      const response = await account.createEmailSession(
        loginCredentials.email,
        loginCredentials.password
      );
      localStorage.setItem("user", JSON.stringify(response));
      navigate("/dashboard");
    } catch (error) {
      window.alert(error);
    }
  }
Above Login code is very similar to Signup code with only difference is here we are using createEmailSession method from Account class with creates a new Session with user email. On successful login, we received an object from appwrite about the new session created. We store this object for further use in our localStorage.
Conclusion:
In this blog, we understood about Appwrite and what does it do. We created our First Appwrite project and Integrated it with our Web application. We also implemented our Signup and Login functionality with explicitly implemented a backend for our application. All this was possible with the help of Appwrite.
This Introduction is just scratching the tip of the iceberg. In the next blog we will dive deep into more features and services provided by Appwrite. We will use appwrite database to understand how CRUD operations happen with appwrite, we will implement our own serverless function and how to use Google OAuth provider to authenticate our users.
If you find this blog useful please like, comment and share it everywhere.
You can connect with me on Linkedin, Twitter.
Thankyou!